How to Seamlessly Blend Drywall Patches with Existing Walls
Repairing drywall can often seem like a daunting task, especially when you want to ensure the patched area blends seamlessly with the existing wall. Achieving a flawless finish requires the right materials, techniques, and a bit of patience. At Windsor Drywallers, we specialize in making drywall repairs invisible. Here’s our guide to help you seamlessly blend drywall patches with your existing walls.
Step-by-Step Guide to Blending Drywall Patches
1. Gather Your Materials
Before you start, make sure you have all the necessary materials:
- Drywall patch or a piece of drywall cut to size
- Joint compound (mud)
- Drywall tape (mesh or paper)
- Sanding sponge or sandpaper (120 to 150 grit)
- Putty knife or drywall knife (6-inch and 12-inch)
- Primer and paint
- Drop cloths and painter's tape
2. Prepare the Area
- Clean the Surface: Remove any loose debris, dust, and dirt around the damaged area.
- Cut Out the Damaged Drywall: Use a utility knife to cut out the damaged area into a square or rectangular shape for easier patching.
3. Install the Drywall Patch
- Cut the Patch: Cut a piece of drywall to fit the hole. Ensure it’s a snug fit.
- Secure the Patch: If the hole is small, you can use a drywall repair patch. For larger holes, screw the patch into place using drywall screws and attach it to the studs or a backing support.
4. Apply Drywall Tape
- Tape the Seams: Apply drywall tape over the seams of the patch. For smaller repairs, mesh tape works well and is easier to apply. For larger areas, use paper tape for stronger seams.
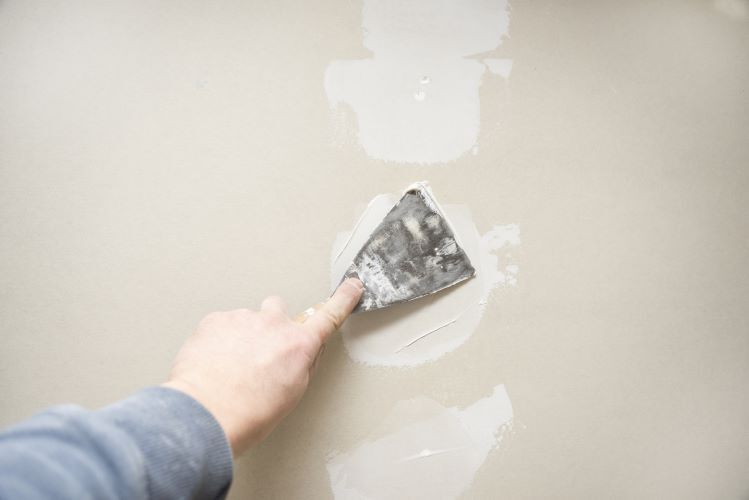
5. Apply Joint Compound
- First Coat: Apply a thin layer of joint compound over the tape and seams with a 6-inch putty knife. Feather the edges to blend with the surrounding wall.
- Let it Dry: Allow the compound to dry completely, following the manufacturer's instructions.
- Second Coat: Apply a second, wider coat with a 12-inch knife, feathering the edges further out. This helps to ensure a smooth transition between the patch and the existing wall.
- Final Coat: Apply a final, thin coat, feathering the edges even more. This coat should be very smooth with no visible edges.
6. Sand the Surface
- Sand Smooth: Once the final coat is dry, sand the area with a sanding sponge or sandpaper. Use a light touch to avoid creating dips or uneven surfaces. Sand until the patch is smooth and blends with the surrounding wall.
7. Prime and Paint
- Prime the Area: Apply a coat of primer over the patched area. This step is crucial as it ensures the paint adheres evenly and hides the repaired area.
- Paint: Once the primer is dry, paint the area to match the rest of the wall. For the best results, use the same type of paint (e.g., flat, satin, gloss) and blend carefully to ensure a seamless finish.
8. Final Touches
- Inspect the Repair: Look for any imperfections or areas that might need additional sanding or a touch-up coat of compound.
- Clean Up: Clean up any dust or debris from sanding, and remove painter's tape and drop cloths.
Tips for a Seamless Finish
- Feathering: Feather the edges of each coat of joint compound wider than the previous one to create a smooth transition.
- Multiple Light Coats: Apply several thin coats of joint compound rather than one thick coat to prevent cracking and ensure smooth blending.
- Consistent Texture: Match the texture of the repaired area to the existing wall. If your wall has a texture, use a texture spray or tool to replicate it on the patch.
Conclusion
Blending drywall patches seamlessly with existing walls takes practice and attention to detail, but it is achievable with the right techniques. By following these steps, you can ensure that your drywall repairs are virtually invisible, leaving your walls looking flawless.
For professional drywall repair services in Windsor, Ontario, trust the experts at Windsor Drywallers. We have the experience and skills to handle all your drywall repair needs, ensuring a seamless and high-quality finish every time. Contact us today to learn more about our services and how we can help you maintain the beauty and integrity of your home’s interior walls.
You might also like


